
Site identity
In simple words
Site identity is part of Website. Brand, contact and social details. This guide takes you through it in 7 short steps.
Where it fits in your work — Style. Choose a theme, preview it live and customise colours, fonts and components.
Before you start
- You need to be signed in to your company's workspace. Website appears in the Workspace dashboard and in the left menu when your role includes it.
- What you can see and change depends on your role. If a menu item or button is missing, ask your workspace owner to give your role access in Workspace → Users.
- Site identity belongs to Appearance in Website. Brand, contact and social details.
Step by step
- 1
Step 1
Open Website
Sign in and open the Website panel from your Workspace dashboard (or sign in to it directly). You see only what your role allows.
- 2
Step 2
Open “Site Identity”
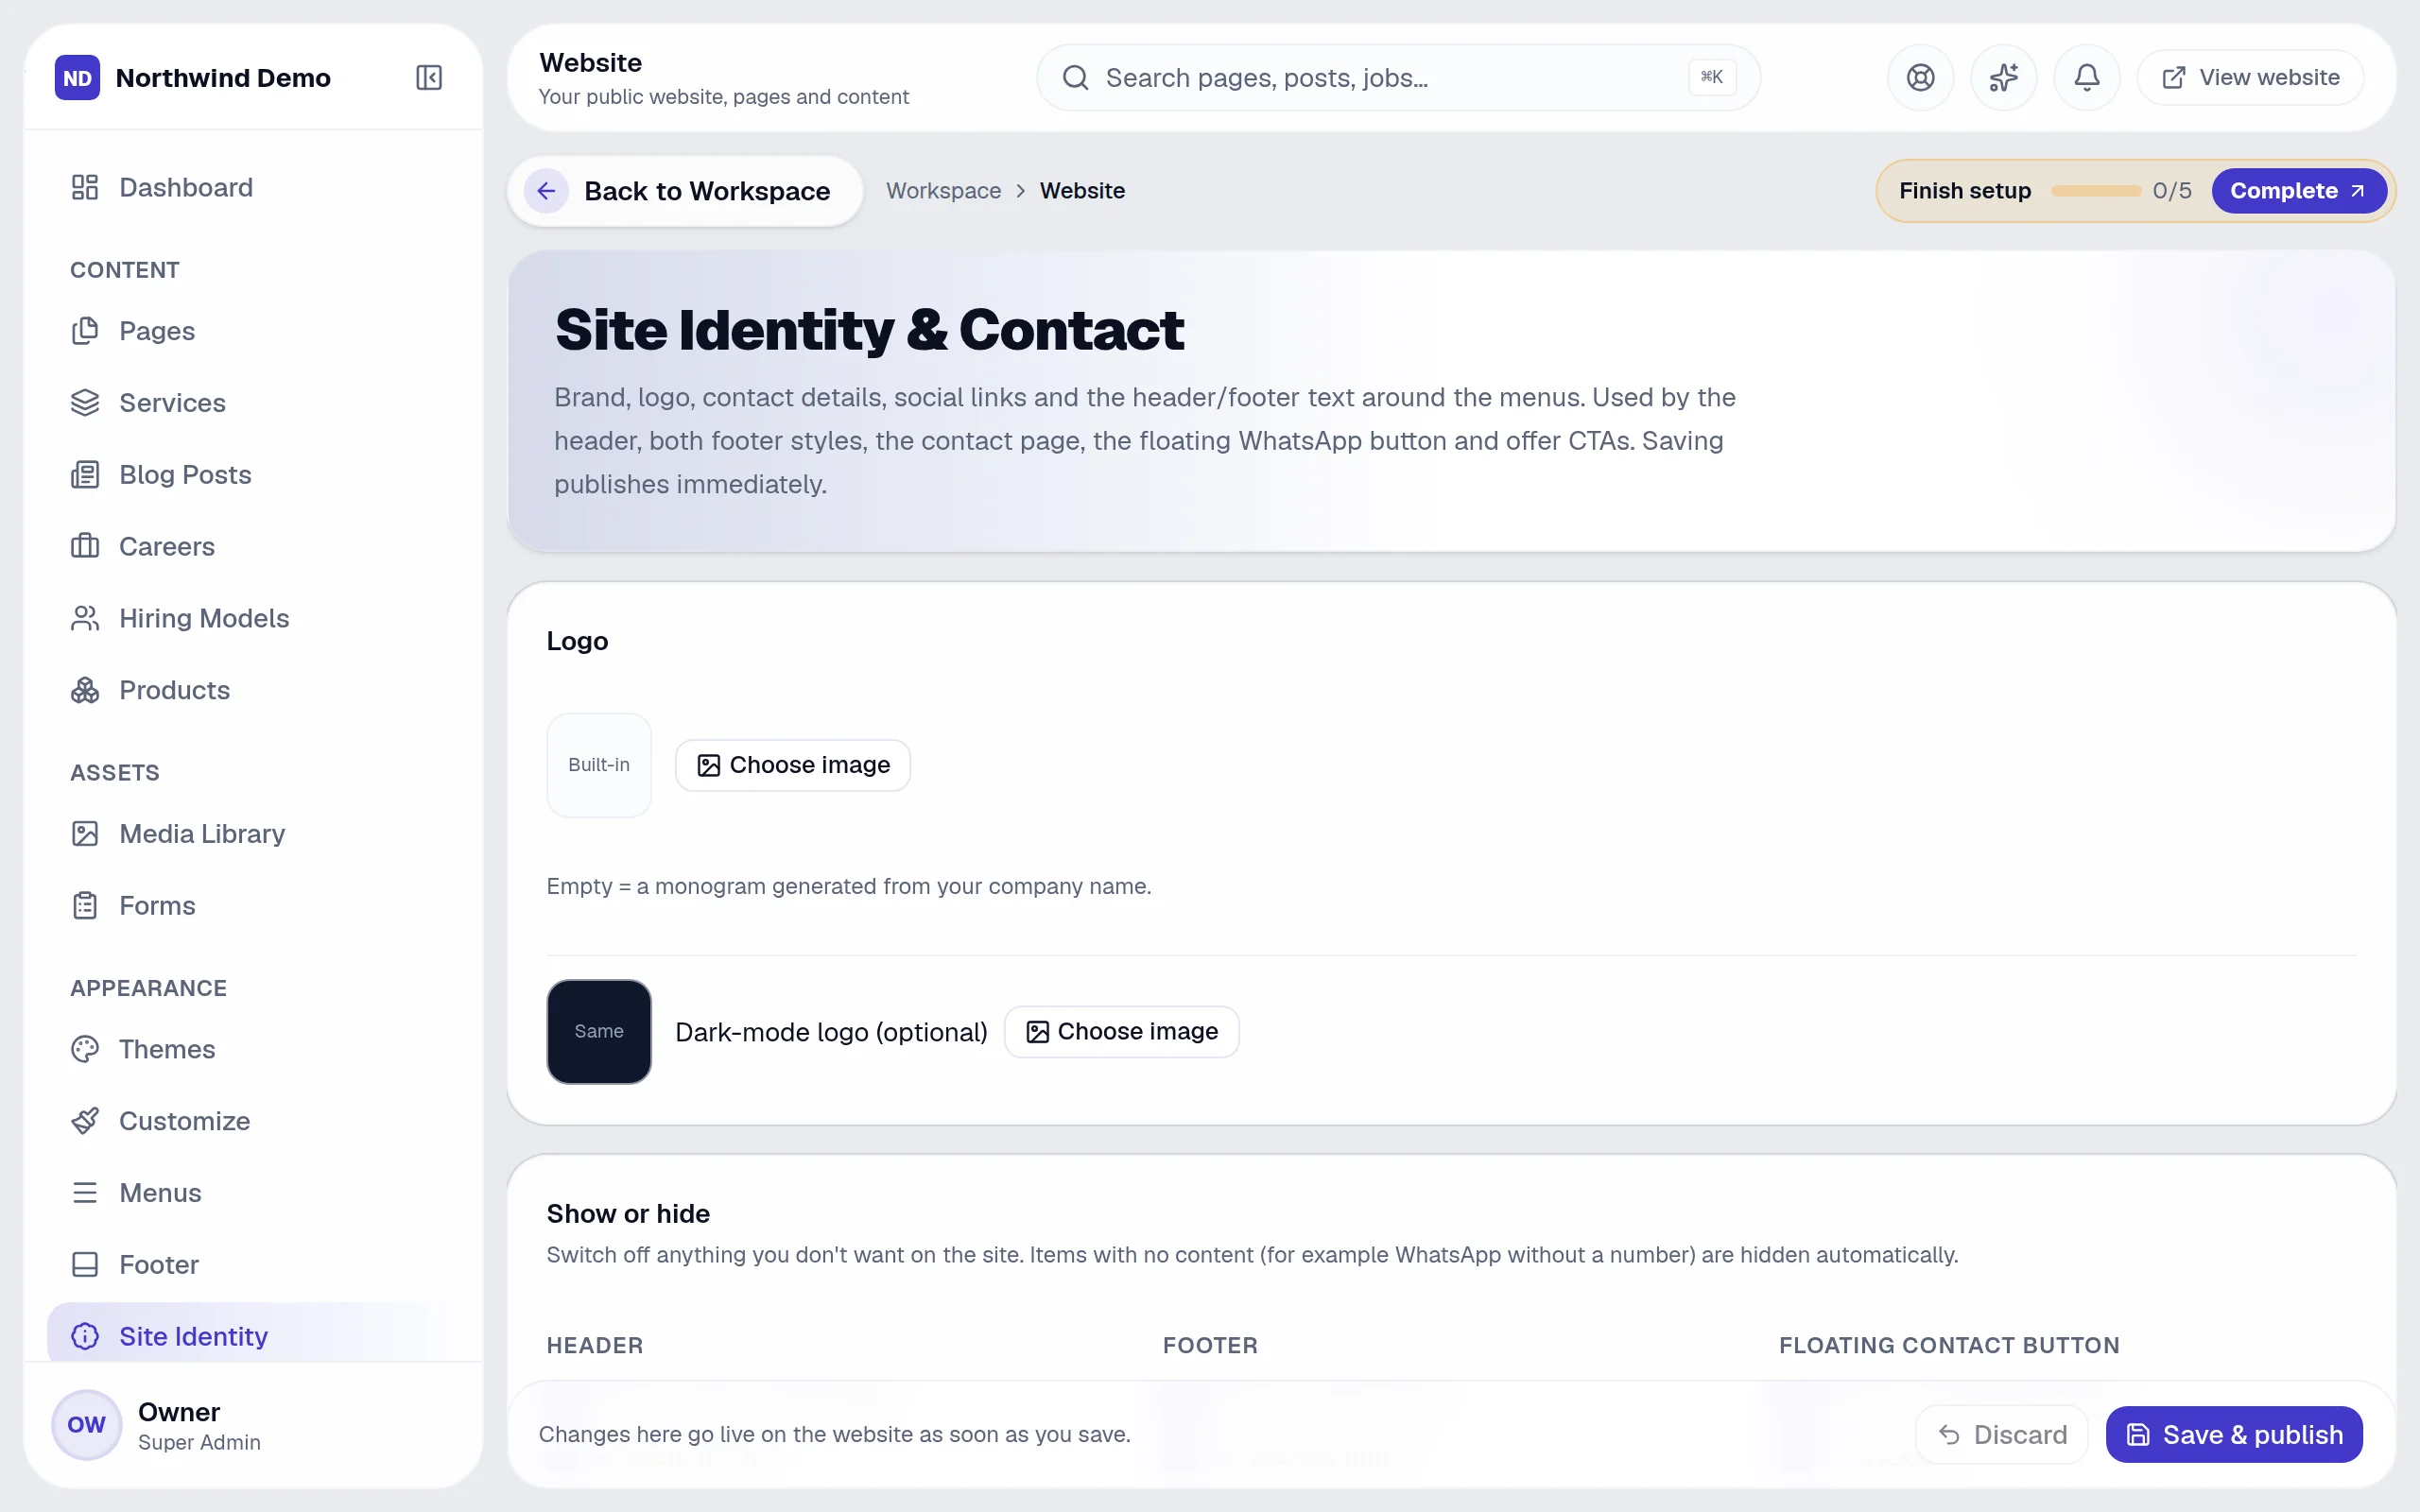
In the left menu, click “Site Identity”. The “Site Identity & Contact” screen opens.
- 3
Step 3
Find what you need
Type in the search box (“Search…”) to find a record quickly.
- 4
Step 4
Narrow the list
Use these filters to see only what you want:
- Light / dark mode toggle
- AI assistant link
- Login / Dashboard link
- Call-to-action button
- Social icons in the header bar
- Mobile menu — contact tiles (consultation, chat, WhatsApp)
- Call-to-action band
- WhatsApp button
- Email & phone
- Social icons
- About paragraph
- Copyright & legal links bar
- Show the floating button
- AI assistant
- 5
Step 5
Add a new one
Click “Add social link” to add one. A form opens for the details.
- 6
Step 6
Other actions on this screen
You will also see these buttons:
- Choose image
- Add link
- Discard
- Save & publish
- 7
Step 7
Done
Brand, contact and social details.
Tips
- You can use more than one filter together (Light / dark mode toggle, AI assistant link, Login / Dashboard link) to see exactly the records you want.
- The search box accepts: Search…. Start typing and the list narrows down.
- If you make a mistake, open the record again and correct it. Changes are recorded against your name so your team can see who did what.
Quick recap
Open Website → Open “Site Identity” → Find what you need → Narrow the list → Add a new one → Other actions on this screen → Done
What it connects to
CRM & Sales
Every form submission becomes a lead.
SEO
SEO tools read and drive the site.
AI Assistants
The website chatbot uses your knowledge base.
Client & Student Portal
Rewards and referrals extend into the portal.
What you will see on this screen
These are the parts of the Site Identity & Contact screen, exactly as they appear in the product.
Search and filters
- Search…
- Light / dark mode toggle
- AI assistant link
- Login / Dashboard link
- Call-to-action button
- Social icons in the header bar
- Mobile menu — contact tiles (consultation, chat, WhatsApp)
- Call-to-action band
- WhatsApp button
- Email & phone
- Social icons
- About paragraph
- Copyright & legal links bar
- Show the floating button
- AI assistant
Buttons
- Choose image
- Add social link
- Add link
- Discard
- Save & publish
Sections
- Logo
- Show or hide
- Brand
- Header
- Floating contact button
- Contact details
- Footer
- Share image (social previews)
- Social links
- Footer — legal links (bottom bar)
- Compact footer — bottom links
- Share image — badges
- Interface text
- Page & widget text (0)
Why use Website
Website replaces website builder, cms & marketing tools, on the same login and the same data.
- Change your website any day — no developer needed
- Forms feed your CRM directly
- Offers, coupons, referrals and wallet credits built in
- AI chatbot and voice AI answer visitors around the clock
Who uses Website
Marketing & content
Edit pages and blog posts, run offers and campaigns.
Designers
Pick and customise themes, menus and the footer.
Approvers
Review pages waiting to be published.
Customer-facing teams
Review chatbot and voice conversations.
More in Appearance
FAQs
Common questions.
About Site identity and Website.
I cannot see Site identity in the menu.
Your role may not include it. Ask your workspace owner to open Workspace → Users and give your role access to Website.
Can I do this on my phone?
Yes. SelfRun AI works in the browser on any device and can be installed as an app on Android, iOS and desktop, with the same screens and the same data.
Does this cost extra?
No. Site identity comes with the Website panel, and every panel is included in every plan.
What is SelfRun AI?
SelfRun AI is a cloud platform that brings your sales, HR, finance, projects, procurement, training, documents, website and team communication into one system, with AI and workflow automation running through all of it.
Do I need to use every module?
No. Each plan includes a set of modules and you switch on only what you need during setup. You can turn modules on or off later from your workspace settings.
Is there a free plan?
Yes. The Free plan is free forever for one person and includes every panel and every feature — no card needed. Paid plans add more people and bigger storage, AI, email and voice allowances.