
Roles & permissions
In simple words
Roles & permissions is part of Workspace. Per-panel roles with per-action permissions. This guide takes you through it in 8 short steps.
Where it fits in your work — Oversee. Follow every panel's live numbers, the audit log, usage against your plan and security.
Before you start
- You need to be signed in to your company's workspace. Workspace appears in the Workspace dashboard and in the left menu when your role includes it.
- What you can see and change depends on your role. If a menu item or button is missing, ask your workspace owner to give your role access in Workspace → Users.
- Roles & permissions belongs to Security & audit in Workspace. Per-panel roles with per-action permissions.
Step by step
- 1
Step 1
Open Workspace
Sign in to your company's Workspace. You see only what your role allows.
- 2
Step 2
Open “Users, roles & seats”
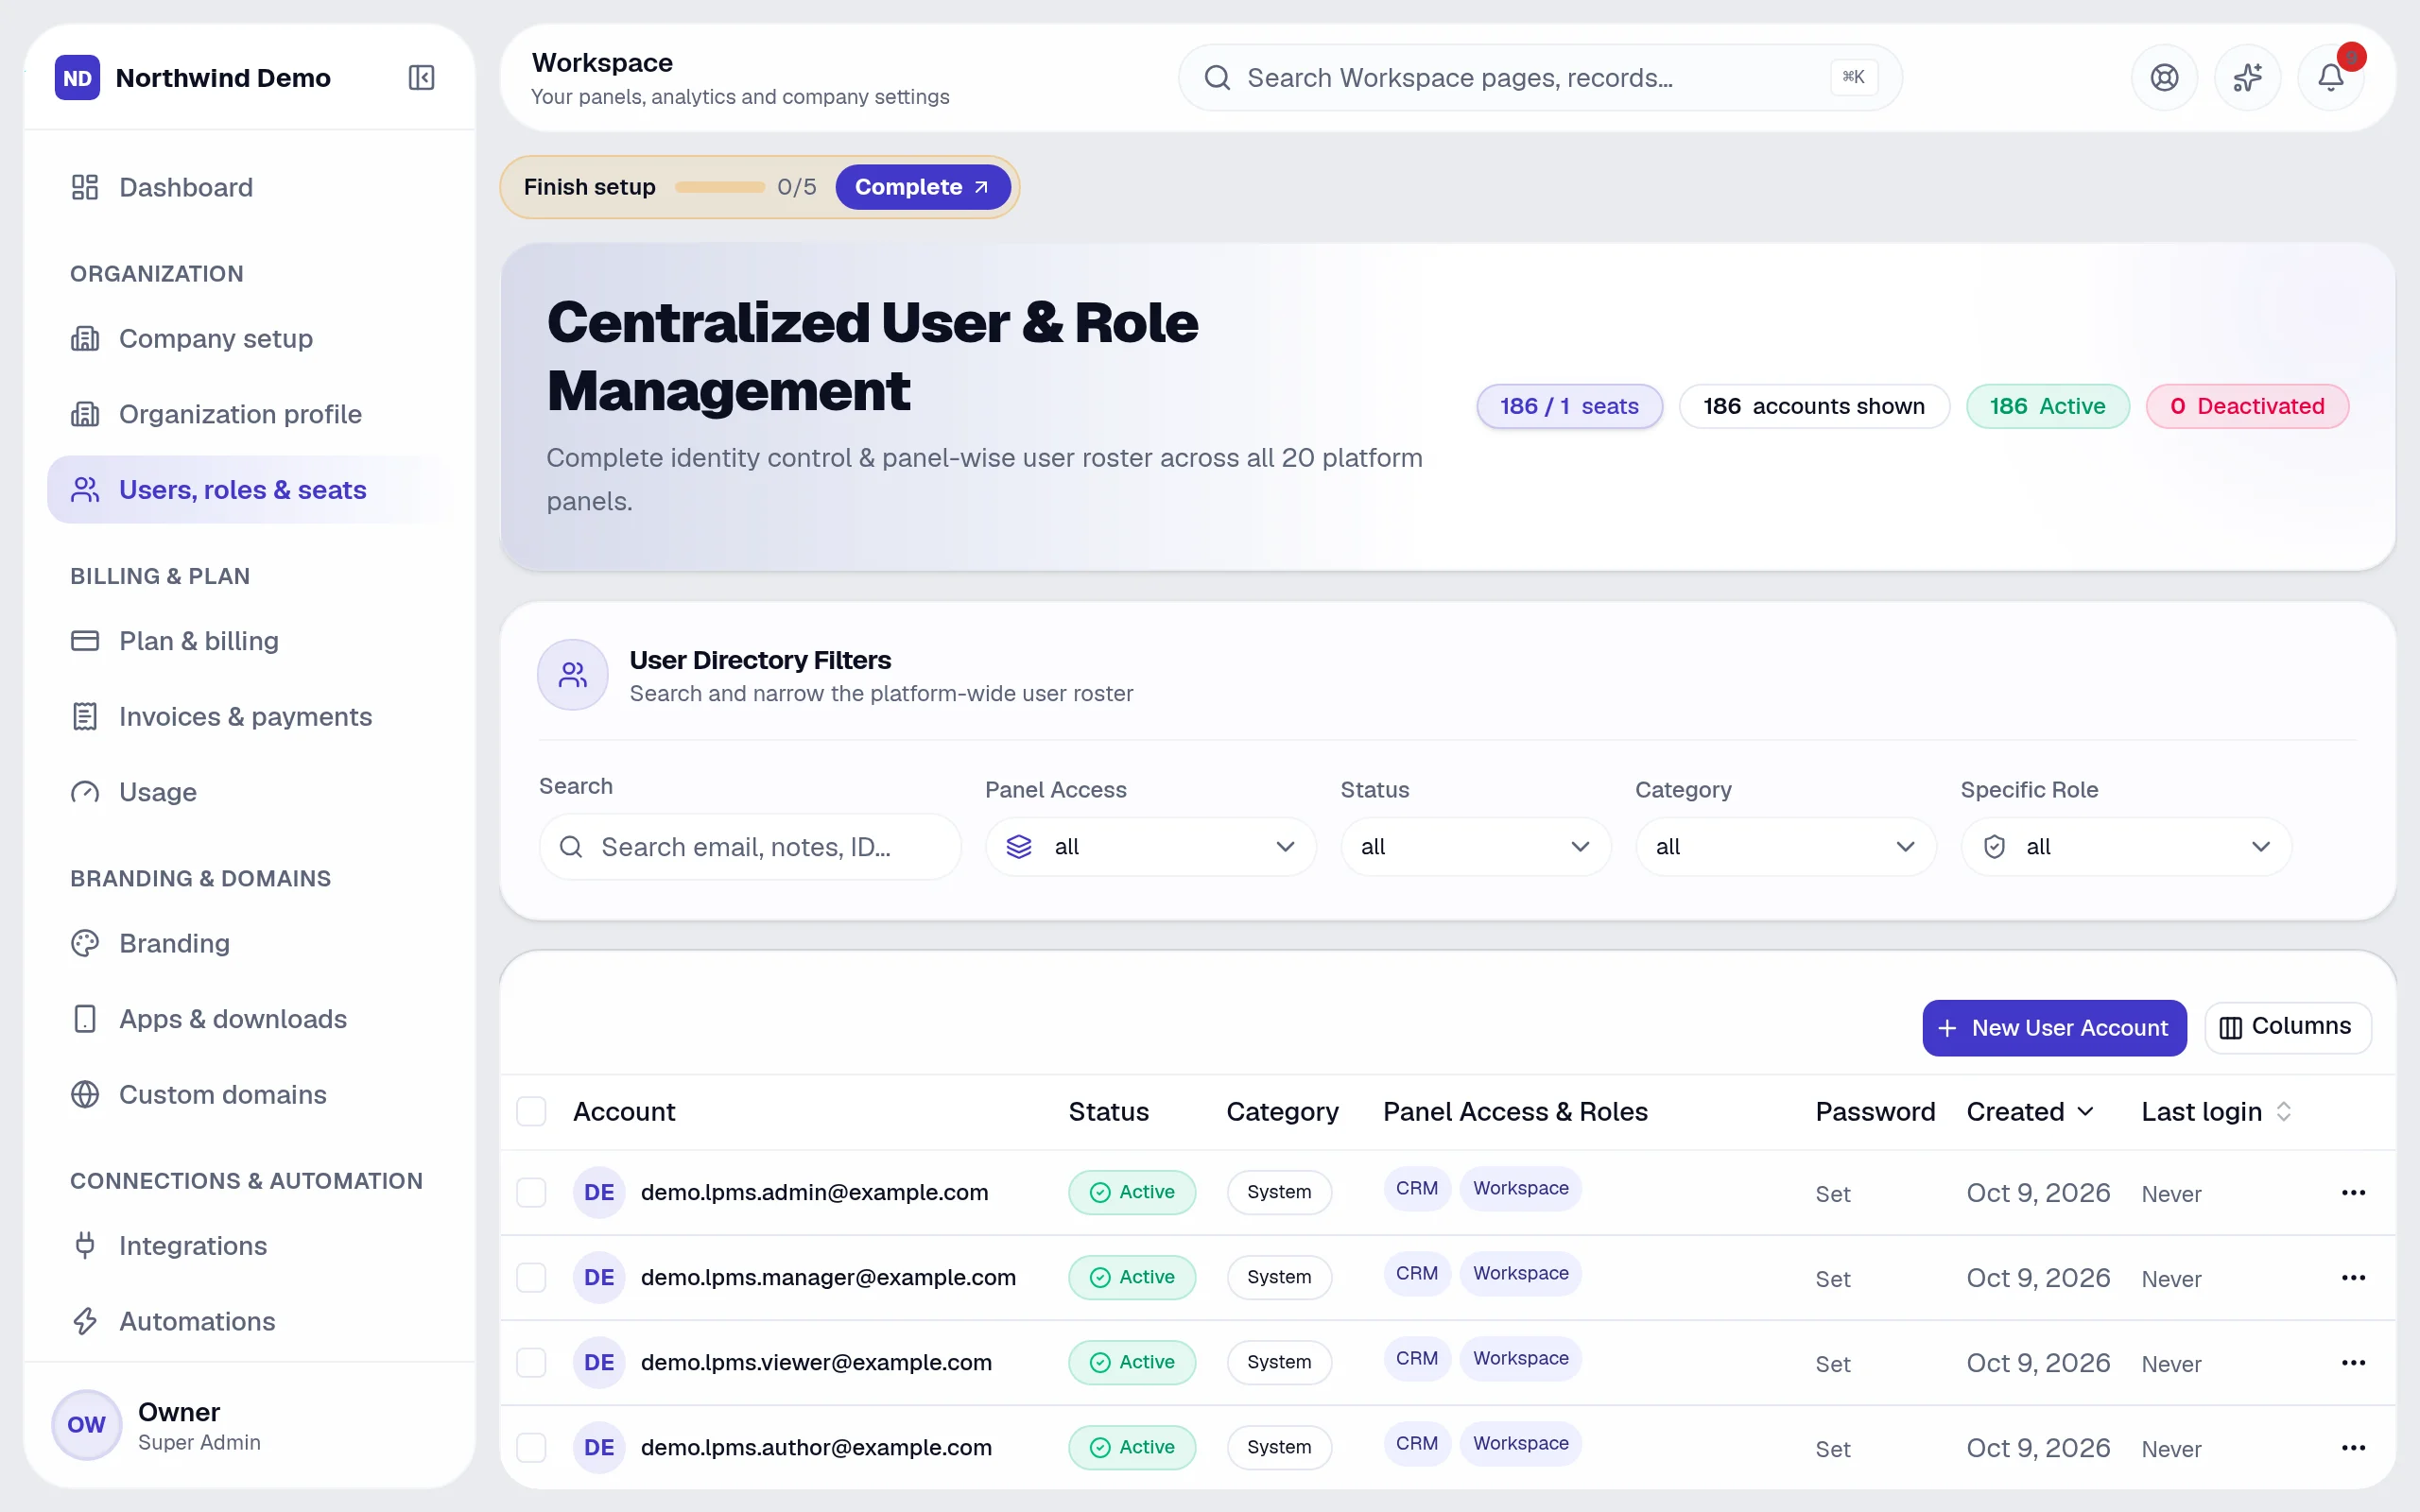
In the left menu, click “Users, roles & seats”. The “Centralized User & Role Management” screen opens.
- 3
Step 3
Find what you need
Type in the search box (“Search email, notes, ID...”) to find a record quickly.
- 4
Step 4
Narrow the list
Use these filters to see only what you want:
- Search
- Panel Access
- Status
- Category
- Specific Role
- 5
Step 5
Read the list
Each row shows:
- Account
- Status
- Category
- Panel Access & Roles
- Password
- Created
- Last login
- 6
Step 6
Add a new one
Click “New User Account” to add one. A form opens for the details.
- 7
Step 7
Other actions on this screen
You will also see these buttons:
- Created
- Last login
- 8
Step 8
Done
Per-panel roles with per-action permissions.
Tips
- You can use more than one filter together (Panel Access, Status, Category) to see exactly the records you want.
- The search box accepts: Search email, notes, ID.... Start typing and the list narrows down.
- Click a row to open that record and see all of its details.
- If you make a mistake, open the record again and correct it. Changes are recorded against your name so your team can see who did what.
Quick recap
Open Workspace → Open “Users, roles & seats” → Find what you need → Narrow the list → Read the list → Add a new one → Other actions on this screen → Done
What it connects to
AI Intelligence
Ask questions across all of the data the Workspace oversees.
Help & Support
Help and requests to the product team, from inside the Workspace.
Client & Student Portal
Decide who outside your company gets a portal, and see their activity.
What you will see on this screen
These are the parts of the Centralized User & Role Management screen, exactly as they appear in the product.
Search and filters
- Search email, notes, ID...
- Search
- Panel Access
- Status
- Category
- Specific Role
Columns in the list
- Account
- Status
- Category
- Panel Access & Roles
- Password
- Created
- Last login
Buttons
- New User Account
- Created
- Last login
Sections
- User Directory Filters
Why use Workspace
Workspace replaces dashboards, user admin, automation & integration tools, on the same login and the same data.
- See the whole company on one screen instead of opening ten tools
- Control who can see and do what, down to a single action
- Automate follow-ups across every panel without developers
- One audit log and one place for billing, brand and security
Who uses Workspace
Founders & owners
Watch the whole company on one dashboard and control access, billing and brand.
Administrators
Invite people, assign roles, import data and switch panels on or off.
Managers
Open any panel's analytics with date, department and owner filters.
Everyone
Get one notification inbox and one place to manage their own sessions and devices.
More in Security & audit
FAQs
Common questions.
About Roles & permissions and Workspace.
I cannot see Roles & permissions in the menu.
Your role may not include it. Ask your workspace owner to open Workspace → Users and give your role access to Workspace.
Can I do this on my phone?
Yes. SelfRun AI works in the browser on any device and can be installed as an app on Android, iOS and desktop, with the same screens and the same data.
Does this cost extra?
No. Roles & permissions comes with the Workspace panel, and every panel is included in every plan.
What is SelfRun AI?
SelfRun AI is a cloud platform that brings your sales, HR, finance, projects, procurement, training, documents, website and team communication into one system, with AI and workflow automation running through all of it.
Do I need to use every module?
No. Each plan includes a set of modules and you switch on only what you need during setup. You can turn modules on or off later from your workspace settings.
Is there a free plan?
Yes. The Free plan is free forever for one person and includes every panel and every feature — no card needed. Paid plans add more people and bigger storage, AI, email and voice allowances.